
Mod 介面圖庫
查看 Claude Code mod 可以繪製的介面元素,例如文字、按鈕、欄位、Markdown、程式碼和差異,並附有範例程式碼和終端機螢幕截圖。
Mod 使用元素來繪製其介面:文字、方塊、按鈕、欄位,以及一些會替您格式化內容的元素。此處的範例展示了繪製元素的程式碼,大多數範例還附有在終端機窗格中呈現結果的螢幕截圖,讓您可以依外觀挑選元素。
若要了解繪製的運作方式,請從在介面中繪製開始。如需主要 props 以及哪些應用程式會繪製各個元素,請參閱元素參考。型別宣告列出了所有 props。
試用範例
本頁的範例是程式碼片段,而非完整的 mod。每個範例都是一個元素及其內部巢狀內容的程式碼。
若要在您自己的終端機中查看範例,請依照以下步驟建立小型 mod,並將範例貼入其中。此 mod 會新增一個 /gallery 命令,開啟一個窗格並在其中繪製範例。窗格在寬版全螢幕終端機中是逐字稿旁的側邊欄,否則則是提示詞上方的框線區域。
建立 mod
建立一個名為 gallery 的目錄,並在其中建立 .claude-plugin 和 hooks 目錄。建立 mod 說明了這些檔案。
將 manifest 儲存為 gallery/.claude-plugin/plugin.json:
{
"name": "gallery",
"version": "0.1.0",
"description": "Opens a pane that draws one sample",
"author": { "name": "Your Name" }
}
在 gallery/hooks/hooks.json 中指定您的進入點:
{
"modules": ["./register.js"]
}
將程式碼儲存為 gallery/hooks/register.js。它會新增一個開啟窗格的 /gallery 命令,並在該窗格中繪製 Plain text:
// Stands in for your own callback in the samples that take one
const noop = () => {}
// The Select sample keeps its choice here
let picked = 'md'

// The Raster sample packs its cells with this function
const DEFAULT_COLOR = 0x01000000
function cellsOf(rows) {
const numbers = rows.flat().flatMap(([char, color]) => [char.codePointAt(0), color, DEFAULT_COLOR])
return new Uint8Array(Uint32Array.from(numbers).buffer).toBase64()
}

export function register(on) {
on('session.start', async ($, e, next) => {
await $.command.register({ name: 'gallery', description: 'Open the sample pane' })
return next(e)
})

on('command.run', { command: 'gallery' }, async ($) => {
await $.ui.open({ id: 'gallery', focus: true, closeOnEscape: true })
return {}
})

on('ui.render', { component: 'Pane' }, async ($, e, next) => {
if (e.requestId !== 'gallery') return next(e)
const { Box, Text, Button, Input, Select, Link, Markdown, Code, Raster, Svg } = $.ui.resolve(e)
// Replace the element after return with a sample
return Text({ children: ['Plain text'] })
})
}
執行 mod
在您的 shell 中,從包含 gallery 的目錄啟動 Claude Code:
claude --plugin-dir ./gallery
在 Claude Code 提示字元中,執行 /gallery。會開啟一個顯示 Plain text 的窗格。
換入範例
從本頁複製一個範例。在 register.js 中,將其貼上以取代 Text({ children: ['Plain text'] }),使其接在 return 之後,然後儲存檔案。每次儲存時 Claude Code 都會重新載入模組,因此再次執行 /gallery 即可查看新範例。
挑選元素
範例依您想在螢幕上呈現的內容分組:
- 顯示文字:
Text、Markdown和Link - 顯示程式碼與變更:
Code - 排列元素:
Box - 接收輸入:
Button、Input和Select - 繪製圖片:
Raster、Svg、Image和Client
顯示文字
有三個元素可將文字呈現在螢幕上:Text 用於套用您自己的樣式,Markdown 用於已格式化的內容,Link 則用於 URL。
`Text`
Text 會以您指定的樣式繪製字串。此範例為每種樣式各顯示一行:
Box({
  flexDirection: 'column',
  children: [
    Text({ children: ['Plain text'] }),
    Text({ bold: true, children: ['bold'] }),
    Text({ italic: true, children: ['italic'] }),
    Text({ underline: true, children: ['underline'] }),
    Text({ strikethrough: true, children: ['strikethrough'] }),
    Text({ dimColor: true, children: ['dimColor'] }),
    Text({ inverse: true, children: ['inverse'] }),
    Text({ color: 'red', children: ["color: 'red'"] }),
    Text({ backgroundColor: 'blue', children: ["backgroundColor: 'blue'"] }),
  ],
})
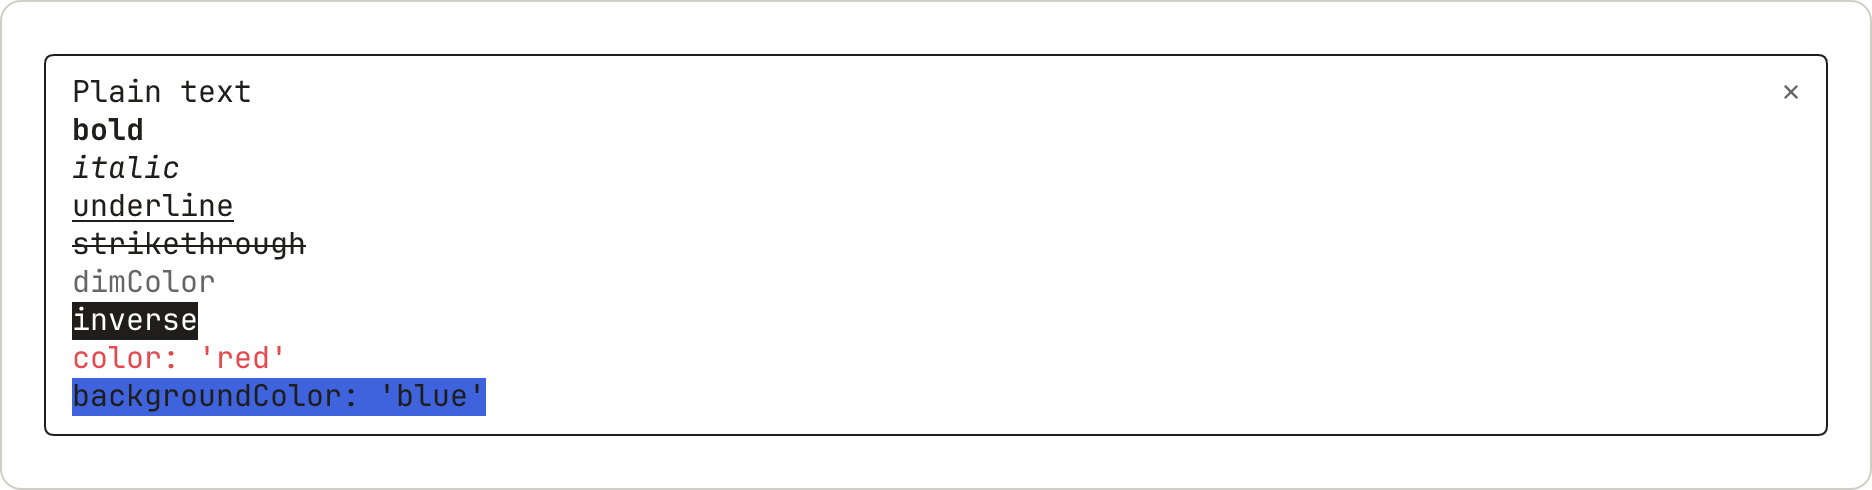
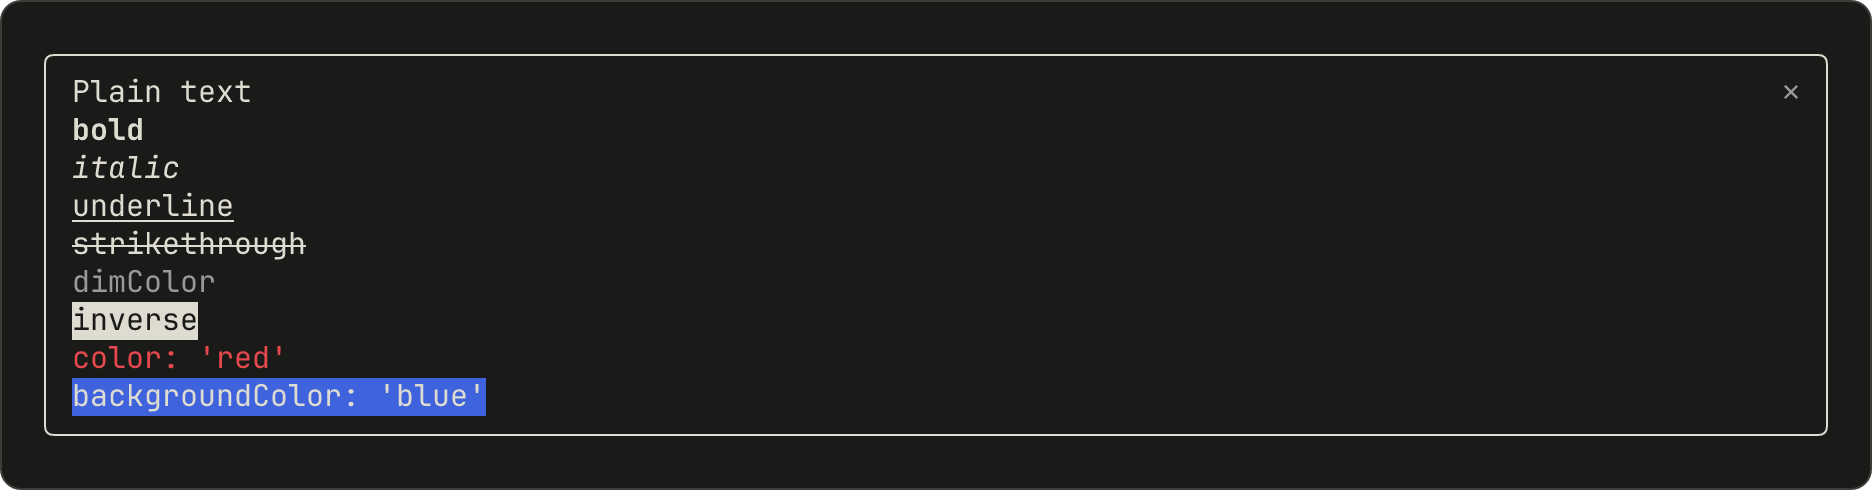
dimColor 會以灰色繪製文字。backgroundColor 只會填滿與文字等寬的範圍。
`Markdown`
Markdown 會以 Claude 回覆的格式來格式化文字。請將內容傳入 text,而非 children:
Markdown({
  text: '## Release notes\n\nThis build has **two** fixes and one `flag`:\n\n- Faster start\n- Fewer prompts\n\n> Quoted text',
})
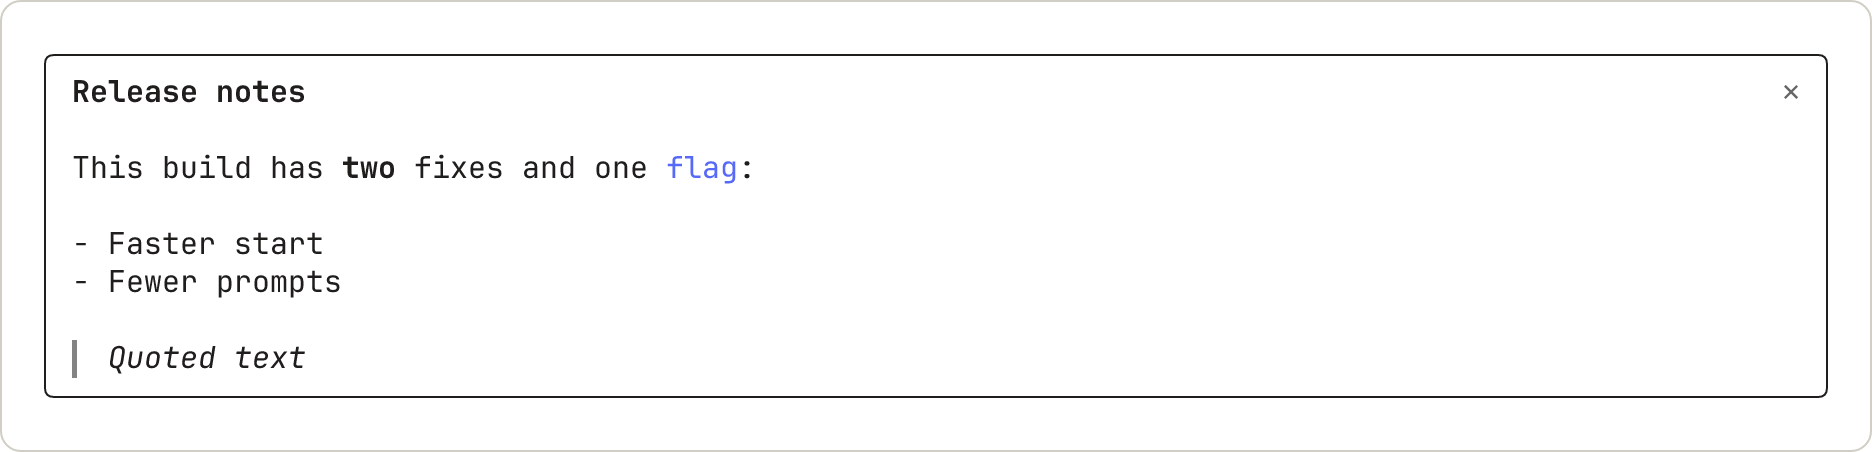
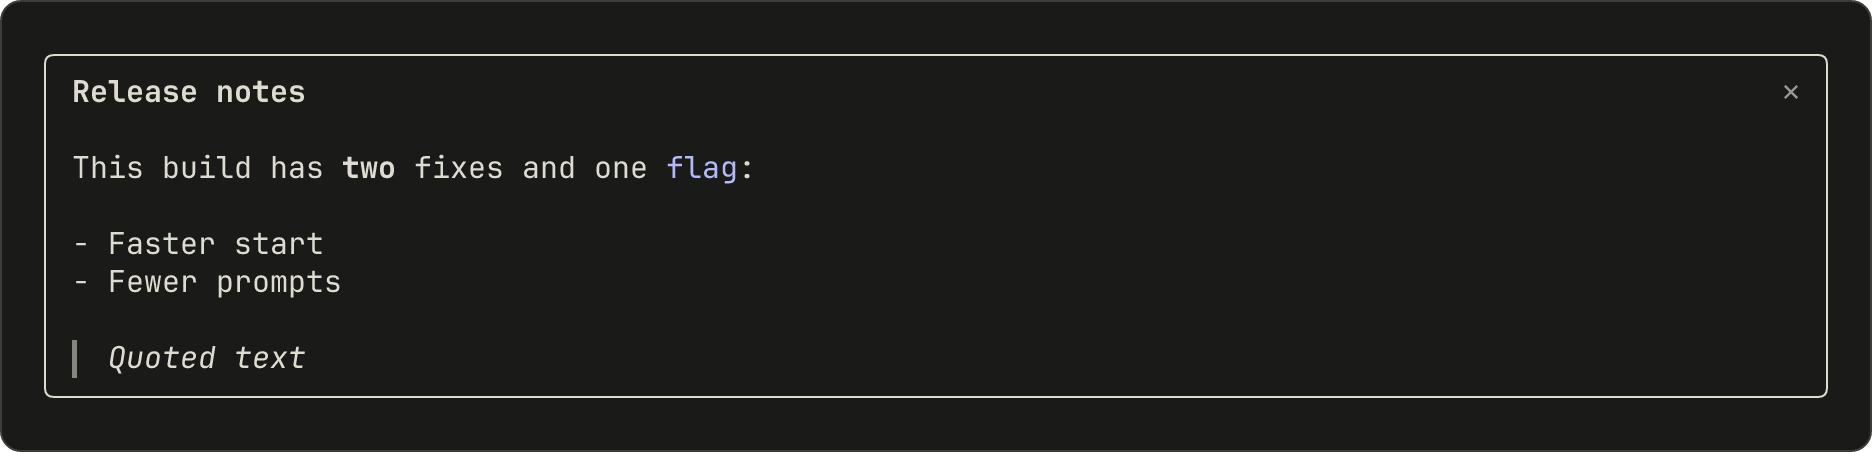
標題會以粗體繪製,不含其 # 符號。行內程式碼會以彩色繪製,不含其反引號。引文會以斜體繪製,左側有一條直線。
`Link`
Link 會繪製一個標籤,後面接著其 URL:
Link({ href: 'https://code.claude.com/docs', label: 'Claude Code docs' })


終端機會在標籤之後以文字形式繪製 URL。點擊是否會開啟它取決於使用者的終端機。
顯示程式碼與變更
Code 會以 Claude Code 本身的語法色彩繪製原始碼文字,或繪製差異。
`Code`
指定 language,或傳入 path 讓 Claude Code 據以推斷語言。使用 startLine 時,各行會從該數字開始編號:
Code({
  language: 'javascript',
  startLine: 1,
  source: "const name = 'mods'\nconsole.log('hello ' + name)",
})


色彩來自使用者的佈景主題。
以 `Code` 顯示差異
使用 format: 'diff' 時,source 是一個或多個 unified diff 區塊:
Code({
  format: 'diff',
  source: '@@ -1,3 +1,3 @@\n # Mods\n-A mod is a plugin.\n+A mod is a plugin that runs code.\n Read on.',
})


Claude Code 會繪製行號來取代 @@ 行。當移除的行與新增的行相似時,有變更的字詞會以較深的底色顯示。
排列元素
`Box`
Box 會將其內部的內容以列或欄的方式排列,並可繪製邊框。此範例在一個有邊框的方塊上方放置一列文字:
Box({
  flexDirection: 'column',
  gap: 1,
  children: [
    Box({
      flexDirection: 'row',
      columnGap: 4,
      children: [Text({ children: ['a row'] }), Text({ children: ['of three'] }), Text({ children: ['items'] })],
    }),
    Box({
      borderStyle: 'round',
      paddingX: 1,
      children: [Text({ children: ["borderStyle: 'round'"] })],
    }),
  ],
})


邊框會延伸至窗格的寬度。
接收輸入
Button、Input 和 Select 是控制項:使用者以 Tab 在它們之間移動,並使用取得焦點的那一個。鍵盤焦點與快速鍵說明了哪些按鍵會傳送到它們。
以 focus: true 開啟窗格會讓窗格取得鍵盤焦點。輸入的字母會在 Input 取得焦點後傳送給它,因此請為應在窗格開啟時立即接收輸入的欄位加上 autoFocus: true。
`Button`
按鈕會執行 onPress。此範例顯示預設形式、帶有快速鍵的 plain 按鈕,以及一個暗淡的按鈕:
Box({
  flexDirection: 'column',
  children: [
    Button({ key: 'save', label: 'Save', onPress: noop }),
    Button({ key: 'next', label: 'Next', hotkey: 'n', plain: true, onPress: noop }),
    Button({ key: 'skip', label: 'Skip', dimColor: true, onPress: noop }),
  ],
})


取得焦點的按鈕會以反白顯示繪製。此處使用者已按了兩次 Tab:


`Input`
Input 是單行文字欄位,會在使用者按下 Enter 時執行 onSubmit:
Input({
  key: 'title',
  label: 'Title',
  placeholder: 'Type a title and press Enter',
  value: '',
  submitLabel: 'save',
  onSubmit: noop,
})
未取得焦點時,欄位會顯示其標籤和預留位置文字:


取得焦點時,標籤會變為粗體,出現游標,並在 ⏎ 之後顯示 submitLabel:


輸入文字會取代預留位置文字:


`Select`
Select 讓使用者從數個選項中挑選一個,並以該選項的 value 執行 onSelect:
Select({
  key: 'format',
  label: 'Format',
  value: picked,
  options: [
    { value: 'md', label: 'Markdown' },
    { value: 'html', label: 'HTML' },
    { value: 'txt', label: 'Plain text' },
  ],
  onSelect: (value) => {
    picked = value
  },
})
關閉時,它會顯示其標籤和目前的選項:


開啟時,它會列出其選項並標示其中一個:


使用者挑選選項後,清單會關閉:


繪製圖片
`Raster`
Raster 是由彩色字元儲存格組成的網格,可用於熱度圖、迷你走勢圖或遊戲棋盤。由終端機負責繪製。此範例使用起始模組中的 cellsOf 函式,將儲存格打包成 Raster 接受的字串。繪製彩色儲存格網格對此有所說明:
Raster({
  key: 'grid',
  columns: 3,
  rows: 2,
  cells: cellsOf([
    [['█', 0x2e7d32], ['█', 0xf9a825], ['█', 0xc62828]],
    [['█', 0x2e7d32], ['█', 0x2e7d32], ['█', 0xf9a825]],
  ]),
})


Raster 會將每個色彩近似為較小調色盤中的顏色,因此 0x2e7d32 會繪製為 #337733。
`Svg`
Svg 會在 Desktop 應用程式中繪製 SVG 文件:
Svg({
  alt: 'Three bars of rising height',
  width: 120,
  height: 60,
  source:
    '<svg xmlns="http://www.w3.org/2000/svg" viewBox="0 0 120 60"><rect x="10" y="40" width="20" height="20" fill="#2e7d32"/><rect x="50" y="25" width="20" height="35" fill="#f9a825"/><rect x="90" y="5" width="20" height="55" fill="#c62828"/></svg>',
})
在終端機中,只回傳 Svg 的窗格會以空白狀態開啟。若要在該處繪製其他內容,請檢查 e.surface 並回傳不同的樹狀結構。
`Image` 和 `Client`
另有兩個元素在此沒有範例。Image 會在終端機中繪製 PNG 或原始像素。Client 是由您的第二個檔案負責繪製的區域,用於動畫和指標輸入。元素參考列出了它們的 props。
除非 Claude Code 偵測到終端機能以 Unicode 預留位置字元繪製 kitty 圖形協定影像,否則使用者看到的會是 Image 的 alt 文字(以暗色顯示),而非圖片。請撰寫能獨立表達意思的 alt 文字。偵測會在啟動時執行:在 kitty 0.28 或更新版本以及 Ghostty 中,只要終端機回應 Claude Code 的圖形查詢,偵測即會成功;在下列情況下則會失敗:
- 其他終端機:不屬於上述兩者的任何終端機,或未回應查詢的終端機。
- tmux 和 screen:在 tmux 或 screen 內執行的工作階段,無論使用哪種終端機,包括 kitty 和 Ghostty。
- 背景工作階段:每個背景工作階段,無論是從哪個終端機附加的。
如果您的 mod 使用者在確實能繪製這類預留位置影像的終端機中看到暗色文字,可以將 CLAUDE_CODE_FORCE_TERMINAL_IMAGES 設為 1,以略過偵測。在 tmux 或 screen 內這樣做並無幫助:alt 文字會消失,且 Claude Code 傳送圖片時不會針對 tmux 或 screen 的直通(passthrough)加以包裝。
了解 mod 可以繪製的位置
這些範例都在窗格中繪製。Mod 也可以在其他位置繪製,並呼叫 Claude Code 替它顯示內容:
- 窗格與橫帶:挑選繪製位置
- Claude Code 本身的列,例如 spinner:變更 Claude Code 既有的繪製內容
- Toast、狀態列與日誌行:在不開始回合的情況下顯示內容
- 問題對話框:保留工具呼叫直到使用者做出決定