1# Visual Studio Code1# Use Claude Code in VS Code
2 2
3> Use Claude Code with Visual Studio Code through the native extension or CLI integration3> Install and configure the Claude Code extension for VS Code. Get AI coding assistance with inline diffs, @-mentions, plan review, and keyboard shortcuts.
4 4
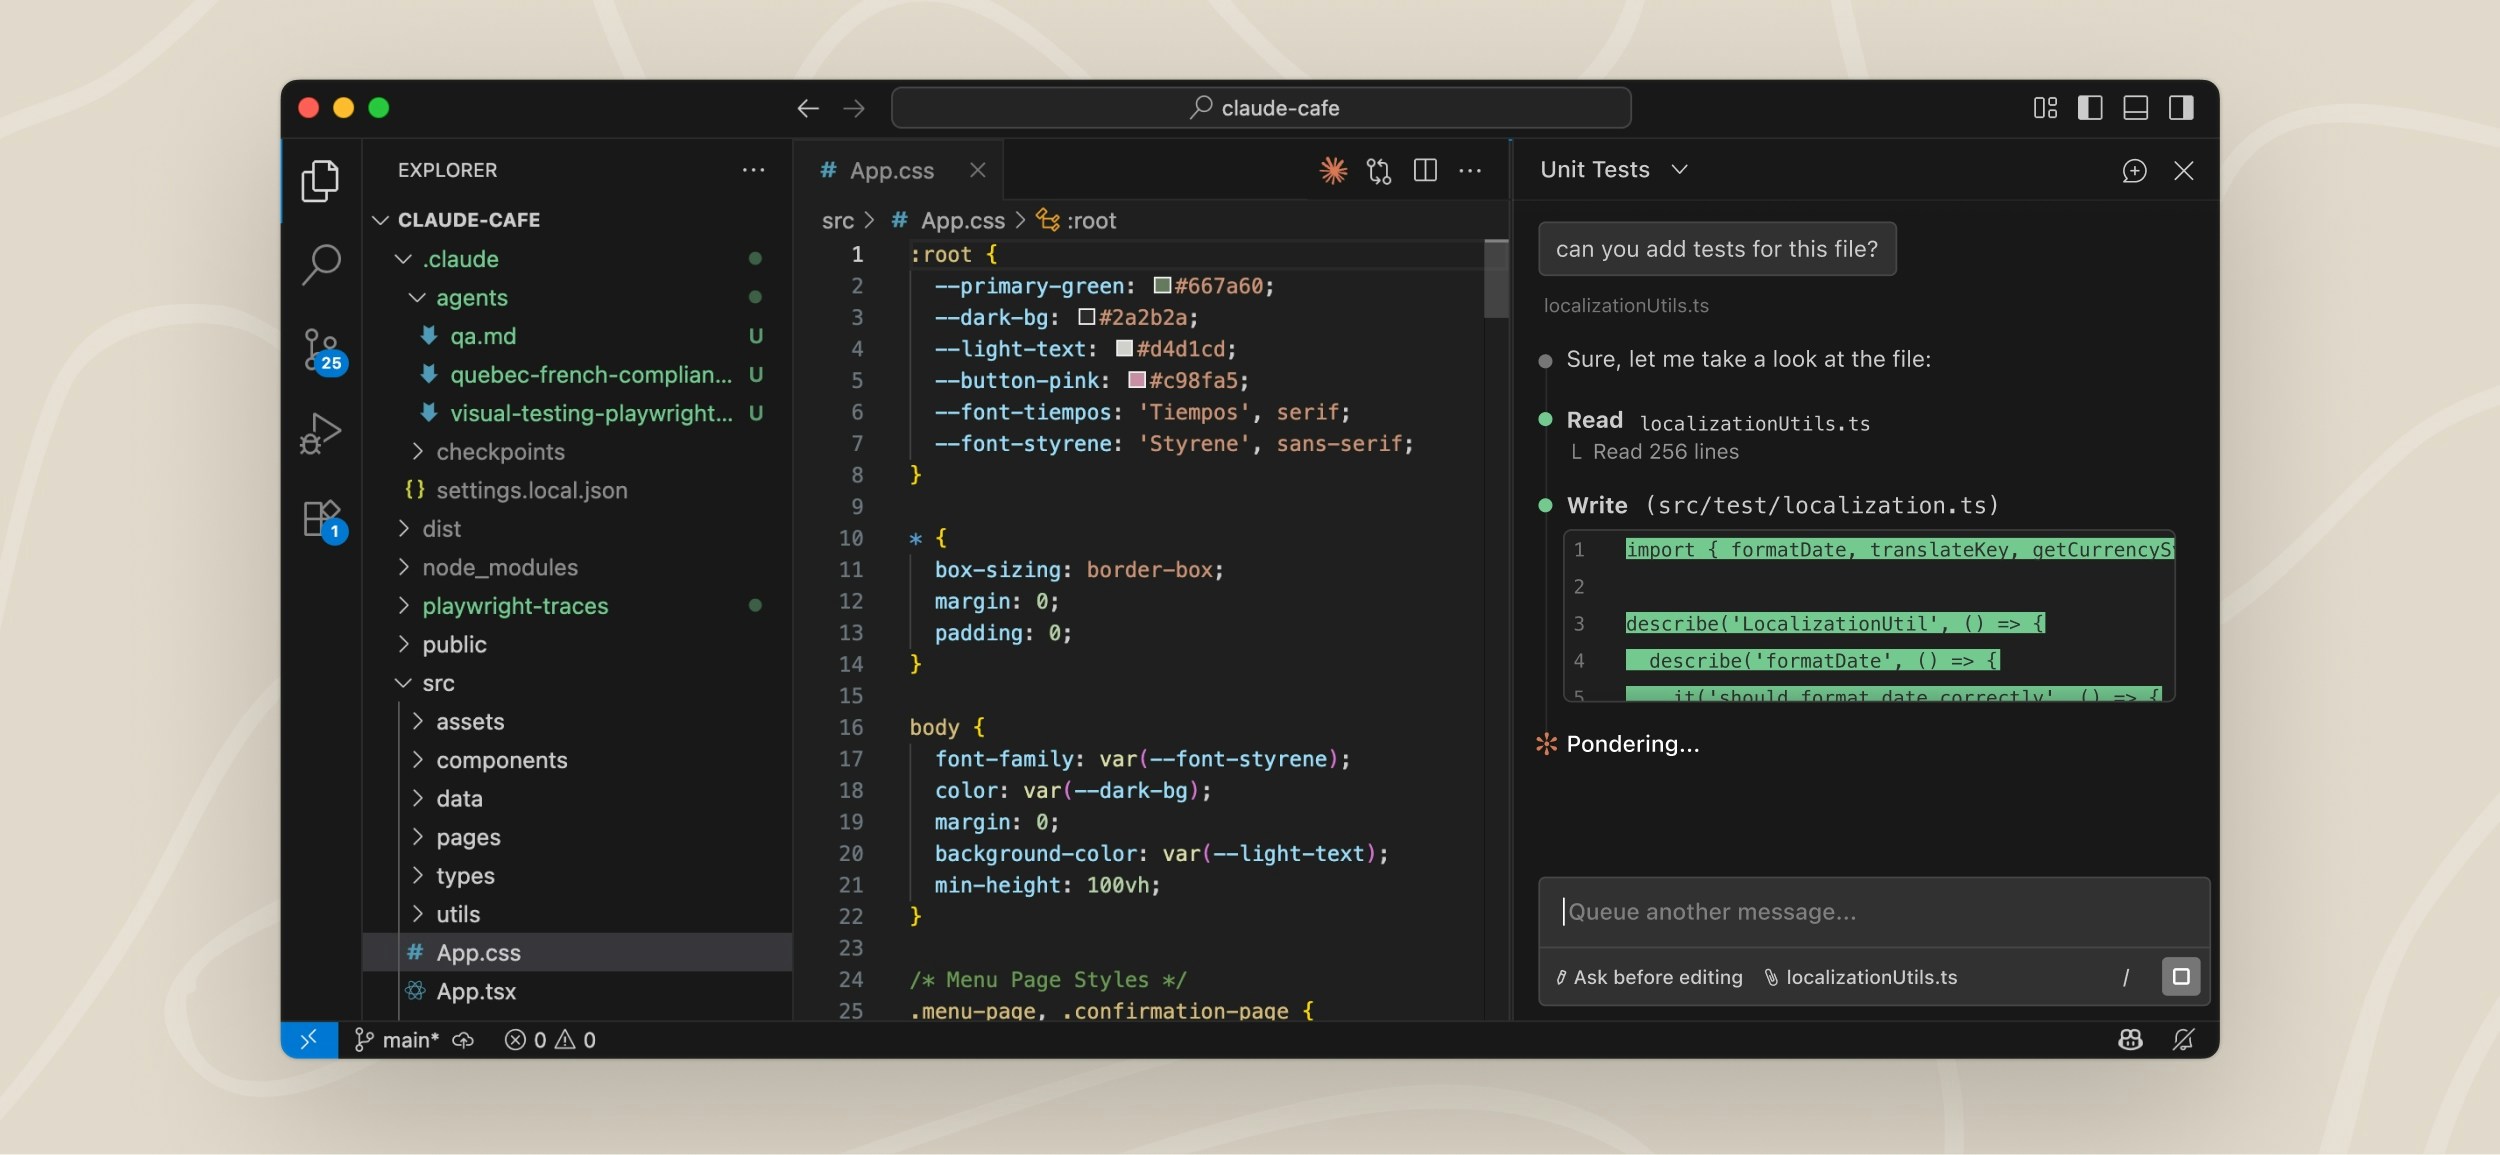
5<img src="https://mintcdn.com/claude-code/-YhHHmtSxwr7W8gy/images/vs-code-extension-interface.jpg?fit=max&auto=format&n=-YhHHmtSxwr7W8gy&q=85&s=300652d5678c63905e6b0ea9e50835f8" alt="Claude Code VS Code Extension Interface" data-og-width="2500" width="2500" data-og-height="1155" height="1155" data-path="images/vs-code-extension-interface.jpg" data-optimize="true" data-opv="3" srcset="https://mintcdn.com/claude-code/-YhHHmtSxwr7W8gy/images/vs-code-extension-interface.jpg?w=280&fit=max&auto=format&n=-YhHHmtSxwr7W8gy&q=85&s=87630c671517a3d52e9aee627041696e 280w, https://mintcdn.com/claude-code/-YhHHmtSxwr7W8gy/images/vs-code-extension-interface.jpg?w=560&fit=max&auto=format&n=-YhHHmtSxwr7W8gy&q=85&s=716b093879204beec8d952649ef75292 560w, https://mintcdn.com/claude-code/-YhHHmtSxwr7W8gy/images/vs-code-extension-interface.jpg?w=840&fit=max&auto=format&n=-YhHHmtSxwr7W8gy&q=85&s=c1525d1a01513acd9d83d8b5a8fe2fc8 840w, https://mintcdn.com/claude-code/-YhHHmtSxwr7W8gy/images/vs-code-extension-interface.jpg?w=1100&fit=max&auto=format&n=-YhHHmtSxwr7W8gy&q=85&s=1d90021d58bbb51f871efec13af955c3 1100w, https://mintcdn.com/claude-code/-YhHHmtSxwr7W8gy/images/vs-code-extension-interface.jpg?w=1650&fit=max&auto=format&n=-YhHHmtSxwr7W8gy&q=85&s=7babdd25440099886f193cfa99af88ae 1650w, https://mintcdn.com/claude-code/-YhHHmtSxwr7W8gy/images/vs-code-extension-interface.jpg?w=2500&fit=max&auto=format&n=-YhHHmtSxwr7W8gy&q=85&s=08c92eedfb56fe61a61e480fb63784b6 2500w" />5<img src="https://mintcdn.com/claude-code/-YhHHmtSxwr7W8gy/images/vs-code-extension-interface.jpg?fit=max&auto=format&n=-YhHHmtSxwr7W8gy&q=85&s=300652d5678c63905e6b0ea9e50835f8" alt="VS Code editor with the Claude Code extension panel open on the right side, showing a conversation with Claude" data-og-width="2500" width="2500" data-og-height="1155" height="1155" data-path="images/vs-code-extension-interface.jpg" data-optimize="true" data-opv="3" srcset="https://mintcdn.com/claude-code/-YhHHmtSxwr7W8gy/images/vs-code-extension-interface.jpg?w=280&fit=max&auto=format&n=-YhHHmtSxwr7W8gy&q=85&s=87630c671517a3d52e9aee627041696e 280w, https://mintcdn.com/claude-code/-YhHHmtSxwr7W8gy/images/vs-code-extension-interface.jpg?w=560&fit=max&auto=format&n=-YhHHmtSxwr7W8gy&q=85&s=716b093879204beec8d952649ef75292 560w, https://mintcdn.com/claude-code/-YhHHmtSxwr7W8gy/images/vs-code-extension-interface.jpg?w=840&fit=max&auto=format&n=-YhHHmtSxwr7W8gy&q=85&s=c1525d1a01513acd9d83d8b5a8fe2fc8 840w, https://mintcdn.com/claude-code/-YhHHmtSxwr7W8gy/images/vs-code-extension-interface.jpg?w=1100&fit=max&auto=format&n=-YhHHmtSxwr7W8gy&q=85&s=1d90021d58bbb51f871efec13af955c3 1100w, https://mintcdn.com/claude-code/-YhHHmtSxwr7W8gy/images/vs-code-extension-interface.jpg?w=1650&fit=max&auto=format&n=-YhHHmtSxwr7W8gy&q=85&s=7babdd25440099886f193cfa99af88ae 1650w, https://mintcdn.com/claude-code/-YhHHmtSxwr7W8gy/images/vs-code-extension-interface.jpg?w=2500&fit=max&auto=format&n=-YhHHmtSxwr7W8gy&q=85&s=08c92eedfb56fe61a61e480fb63784b6 2500w" />
6 6
7## VS Code Extension (Beta)7The VS Code extension provides a native graphical interface for Claude Code, integrated directly into your IDE. This is the recommended way to use Claude Code in VS Code.
8 8
9The VS Code extension, available in beta, lets you see Claude's changes in real-time through a native graphical interface integrated directly into your IDE. The VS Code extension makes it easier to access and interact with Claude Code for users who prefer a visual interface over the terminal.9With the extension, you can review and edit Claude's plans before accepting them, auto-accept edits as they're made, @-mention files with specific line ranges from your selection, access conversation history, and open multiple conversations in separate tabs or windows.
10 10
11### Features11## Prerequisites
12 12
13The VS Code extension provides:13* VS Code 1.98.0 or higher
14* An Anthropic account (you'll sign in when you first open the extension). If you're using a third-party provider like Amazon Bedrock or Google Vertex AI, see [Use third-party providers](#use-third-party-providers) instead.
14 15
15* **Native IDE experience**: Dedicated Claude Code sidebar panel accessed via the Spark icon16You don't need to install the Claude Code CLI first. However, some features like MCP server configuration require the CLI. See [VS Code extension vs. Claude Code CLI](#vs-code-extension-vs-claude-code-cli) for details.
16* **Plan mode with editing**: Review and edit Claude's plans before accepting them
17* **Auto-accept edits mode**: Automatically apply Claude's changes as they're made
18* **Extended thinking**: Toggle extended thinking on/off using the Extended Thinking button in the bottom-right corner of the prompt input
19* **File management**: @-mention files or attach files and images using the system file picker
20* **MCP server usage**: Use Model Context Protocol servers configured through the CLI
21* **Conversation history**: Access to past conversations
22* **Multiple sessions**: Run multiple Claude Code sessions simultaneously
23* **Keyboard shortcuts**: Support for most shortcuts from the CLI
24* **Slash commands**: Access most CLI slash commands directly in the extension
25 17
26### Requirements18## Install the extension
27 19
28* VS Code 1.98.0 or higher20Click the link for your IDE to install directly:
21
22* [Install for VS Code](vscode:extension/anthropic.claude-code)
23* [Install for Cursor](cursor:extension/anthropic.claude-code)
29 24
30### Installation25Or in VS Code, press `Cmd+Shift+X` (Mac) or `Ctrl+Shift+X` (Windows/Linux) to open the Extensions view, search for "Claude Code", and click **Install**.
31 26
32Download and install the extension from the [Visual Studio Code Extension Marketplace](https://marketplace.visualstudio.com/items?itemName=anthropic.claude-code).27<Note>You may need to restart VS Code or run "Developer: Reload Window" from the Command Palette after installation.</Note>
33 28
34### How it works29## Get started
35 30
36Once installed, you can start using Claude Code through the VS Code interface:31Once installed, you can start using Claude Code through the VS Code interface:
37 32
381. Click the Spark icon in your editor's sidebar to open the Claude Code panel33<Steps>
392. Prompt Claude Code in the same way you would in the terminal34 <Step title="Open the Claude Code panel">
403. Watch as Claude analyzes your code and suggests changes35 Throughout VS Code, the Spark icon indicates Claude Code: <img src="https://mintcdn.com/claude-code/mfM-EyoZGnQv8JTc/images/vs-code-spark-icon.svg?fit=max&auto=format&n=mfM-EyoZGnQv8JTc&q=85&s=a734d84e785140016672f08e0abb236c" alt="Spark icon" style={{display: "inline", height: "0.85em", verticalAlign: "middle"}} data-og-width="16" width="16" data-og-height="16" height="16" data-path="images/vs-code-spark-icon.svg" data-optimize="true" data-opv="3" srcset="https://mintcdn.com/claude-code/mfM-EyoZGnQv8JTc/images/vs-code-spark-icon.svg?w=280&fit=max&auto=format&n=mfM-EyoZGnQv8JTc&q=85&s=9a45aad9a84b9fa1701ac99a1f9aa4e9 280w, https://mintcdn.com/claude-code/mfM-EyoZGnQv8JTc/images/vs-code-spark-icon.svg?w=560&fit=max&auto=format&n=mfM-EyoZGnQv8JTc&q=85&s=3f4cb9254c4d4e93989c4b6bf9292f4b 560w, https://mintcdn.com/claude-code/mfM-EyoZGnQv8JTc/images/vs-code-spark-icon.svg?w=840&fit=max&auto=format&n=mfM-EyoZGnQv8JTc&q=85&s=e75ccc9faa3e572db8f291ceb65bb264 840w, https://mintcdn.com/claude-code/mfM-EyoZGnQv8JTc/images/vs-code-spark-icon.svg?w=1100&fit=max&auto=format&n=mfM-EyoZGnQv8JTc&q=85&s=f147bd81a381a62539a4ce361fac41c7 1100w, https://mintcdn.com/claude-code/mfM-EyoZGnQv8JTc/images/vs-code-spark-icon.svg?w=1650&fit=max&auto=format&n=mfM-EyoZGnQv8JTc&q=85&s=78fe68efaee5d6e844bbacab1b442ed5 1650w, https://mintcdn.com/claude-code/mfM-EyoZGnQv8JTc/images/vs-code-spark-icon.svg?w=2500&fit=max&auto=format&n=mfM-EyoZGnQv8JTc&q=85&s=efb8dbe1dfa722d094edc6ad2ad4bedb 2500w" />
414. Review and accept edits directly in the interface
42 * **Tip**: Drag the sidebar wider to see inline diffs, then click them to expand for full details
43 36
44### Configuration37 The quickest way to open Claude is to click this icon in the **Editor Toolbar** (top-right corner of the editor). Note: This icon only appears when you have a file open—opening just a folder isn't enough.
45 38
46The VS Code extension reads the same `settings.json` files as the CLI. See the [settings documentation](/en/settings) for details.39 <img src="https://mintcdn.com/claude-code/mfM-EyoZGnQv8JTc/images/vs-code-editor-icon.png?fit=max&auto=format&n=mfM-EyoZGnQv8JTc&q=85&s=eb4540325d94664c51776dbbfec4cf02" alt="VS Code editor showing the Spark icon in the Editor Toolbar" data-og-width="2796" width="2796" data-og-height="734" height="734" data-path="images/vs-code-editor-icon.png" data-optimize="true" data-opv="3" srcset="https://mintcdn.com/claude-code/mfM-EyoZGnQv8JTc/images/vs-code-editor-icon.png?w=280&fit=max&auto=format&n=mfM-EyoZGnQv8JTc&q=85&s=56f218d5464359d6480cfe23f70a923e 280w, https://mintcdn.com/claude-code/mfM-EyoZGnQv8JTc/images/vs-code-editor-icon.png?w=560&fit=max&auto=format&n=mfM-EyoZGnQv8JTc&q=85&s=344a8db024b196c795a80dc85cacb8d1 560w, https://mintcdn.com/claude-code/mfM-EyoZGnQv8JTc/images/vs-code-editor-icon.png?w=840&fit=max&auto=format&n=mfM-EyoZGnQv8JTc&q=85&s=f30bf834ee0625b2a4a635d552d87163 840w, https://mintcdn.com/claude-code/mfM-EyoZGnQv8JTc/images/vs-code-editor-icon.png?w=1100&fit=max&auto=format&n=mfM-EyoZGnQv8JTc&q=85&s=81fdf984840e43a9f08ae42729d1484d 1100w, https://mintcdn.com/claude-code/mfM-EyoZGnQv8JTc/images/vs-code-editor-icon.png?w=1650&fit=max&auto=format&n=mfM-EyoZGnQv8JTc&q=85&s=8b60fb32de54717093d512afaa99785c 1650w, https://mintcdn.com/claude-code/mfM-EyoZGnQv8JTc/images/vs-code-editor-icon.png?w=2500&fit=max&auto=format&n=mfM-EyoZGnQv8JTc&q=85&s=893e6bda8f2e9d42c8a294d394f0b736 2500w" />
47 40
48#### Third-party providers and gateways41 Other ways to open Claude Code:
49 42
50To use the VS Code extension with third-party providers (Amazon Bedrock, Google Vertex AI, Microsoft Foundry) or gateways that handle authentication:43 * **Command Palette**: `Cmd+Shift+P` (Mac) or `Ctrl+Shift+P` (Windows/Linux), type "Claude Code", and select an option like "Open in New Tab"
44 * **Activity Bar**: Run "Claude Code: Open in Side Bar" from the Command Palette once, and a Spark icon will appear in the left sidebar. This is useful if you want quick access without having a file open.
51 45
521. Add the appropriate environment variables for your provider or gateway to your Claude Code `settings.json`:46 You can drag the Claude panel to reposition it anywhere in VS Code, including to the Activity Bar if the Spark icon isn't showing there. See [Customize your workflow](#customize-your-workflow) for details.
53 ```json theme={null}47 </Step>
54 {
55 "env": {
56 "CLAUDE_CODE_USE_BEDROCK": "1",
57 "AWS_REGION": "us-east-2",
58 "AWS_PROFILE": "your-profile"
59 }
60 }
61 ```
62 48
632. Disable the VS Code extension login prompt via [`vscode://settings/claudeCode.disableLoginPrompt`](vscode://settings/claudeCode.disableLoginPrompt) or in VS Code's settings:49 <Step title="Send a prompt">
64 ```json theme={null}50 Prompt Claude Code in the same way you would in the terminal.
65 {51 </Step>
66 "claudeCode.disableLoginPrompt": true
67 }
68 ```
69 52
70For detailed setup instructions and additional configuration options, see:53 <Step title="Review changes">
54 Watch as Claude analyzes your code and suggests changes. Review and accept edits directly in the interface.
55 </Step>
56</Steps>
71 57
72* [Claude Code on Amazon Bedrock](/en/amazon-bedrock)58## Customize your workflow
73* [Claude Code on Google Vertex AI](/en/google-vertex-ai)
74* [Claude Code on Microsoft Foundry](/en/microsoft-foundry)
75 59
76### Not yet implemented60Once you're up and running, you can reposition the Claude panel or switch to terminal mode.
77 61
78The following features aren't yet available in the VS Code extension:62### Change the layout
79 63
80* **MCP server and Plugin configuration UI**: Type `/mcp` to open the terminal-based MCP server configuration, or `/plugin` for Plugin configuration. Once configured, MCP servers and Plugins work in the extension. You can also [configure MCP servers through the CLI](/en/mcp) first, then the extension will use them.64You can drag the Claude panel to reposition it anywhere in VS Code. Grab the panel's tab or title bar and drag it to:
81* **Subagents configuration**: Configure [subagents through the CLI](/en/sub-agents) to use them in VS Code
82* **Checkpoints**: Save and restore conversation state at specific points
83* **Conversation rewinding**: The `/rewind` command is coming soon
84* **Advanced shortcuts**:
85 * `#` shortcut to add to memory (not supported)
86 * `!` shortcut to run bash commands directly (not supported)
87* **Tab completion**: File path completion with tab key
88* **Model selection UI for older models**: To use older model versions like `claude-sonnet-4-20250514`, open VS Code settings for Claude Code (the `/General Config` command) and insert the model string directly into the 'Selected Model' field
89 65
90These features are planned for future updates.66* **Activity Bar**: The left sidebar with icons for Explorer, Search, etc.
67* **Secondary sidebar**: The right side of the window
68* **Editor area**: Opens Claude as a tab alongside your files
91 69
92## Security considerations70This lets you position Claude wherever works best for your workflow.
71
72### Switch to terminal mode
73
74By default, the extension opens a graphical chat panel. If you prefer the CLI-style interface, open the [Use Terminal setting](vscode://settings/claudeCode.useTerminal) and check the box.
75
76You can also open VS Code settings (`Cmd+,` on Mac or `Ctrl+,` on Windows/Linux), go to Extensions → Claude Code, and check **Use Terminal**.
77
78<Note>
79 In terminal mode, the Activity Bar icon (left vertical menu) still opens the graphical panel, while the Editor Toolbar icon (top-right of editor) opens terminal mode. You can use both entry points to switch between interfaces without changing settings.
80</Note>
81
82## VS Code commands and shortcuts
83
84Open the Command Palette (`Cmd+Shift+P` on Mac or `Ctrl+Shift+P` on Windows/Linux) and type "Claude Code" to see all available VS Code commands for the Claude Code extension:
85
86<Note>
87 These are VS Code commands for controlling the extension. For Claude Code slash commands (like `/help` or `/compact`), not all CLI commands are available in the extension yet. See [VS Code extension vs. Claude Code CLI](#vs-code-extension-vs-claude-code-cli) for details.
88</Note>
89
90| Command | Shortcut | Description |
91| -------------------------- | -------------------------------------------------------- | ---------------------------------------------------------------------------------- |
92| Focus Input | `Cmd+Esc` (Mac) / `Ctrl+Esc` (Windows/Linux) | Toggle focus between editor and Claude |
93| Open in Side Bar | — | Open Claude in the left sidebar |
94| Open in Terminal | — | Open Claude in terminal mode |
95| Open in New Tab | `Cmd+Shift+Esc` (Mac) / `Ctrl+Shift+Esc` (Windows/Linux) | Open a new conversation as an editor tab |
96| Open in New Window | — | Open a new conversation in a separate window |
97| New Conversation | `Cmd+N` (Mac) / `Ctrl+N` (Windows/Linux) | Start a new conversation (when Claude is focused) |
98| Insert @-Mention Reference | `Alt+K` | Insert a reference to the current file (includes line numbers if text is selected) |
99| Show Logs | — | View extension debug logs |
100| Logout | — | Sign out of your Anthropic account |
101
102Use **Open in New Tab** or **Open in New Window** to run multiple conversations simultaneously. Each tab or window maintains its own conversation history and context.
103
104## Configure settings
105
106The extension has two types of settings:
107
108* **Extension settings**: Open with `Cmd+,` (Mac) or `Ctrl+,` (Windows/Linux), then go to Extensions → Claude Code.
109
110 | Setting | Description |
111 | ---------------------------------- | ---------------------------------------------------------------------------------------------------------------------------------------------------------------------------- |
112 | Selected Model | Default model for new conversations. Change per-session with `/model`. |
113 | Use Terminal | Launch Claude in terminal mode instead of graphical panel |
114 | Initial Permission Mode | Controls approval prompts for file edits and commands. Defaults to `default` (ask before each action). |
115 | Preferred Location | Default location: sidebar (right) or panel (new tab) |
116 | Autosave | Auto-save files before Claude reads or writes them |
117 | Use Ctrl+Enter to Send | Use Ctrl/Cmd+Enter instead of Enter to send prompts |
118 | Enable New Conversation Shortcut | Enable Cmd/Ctrl+N to start a new conversation |
119 | Respect Git Ignore | Exclude .gitignore patterns from file searches |
120 | Environment Variables | Set environment variables for the Claude process. **Not recommended**—use [Claude Code settings](/en/settings) instead so configuration is shared between extension and CLI. |
121 | Disable Login Prompt | Skip authentication prompts (for third-party provider setups) |
122 | Allow Dangerously Skip Permissions | Bypass all permission prompts. **Use with extreme caution**—recommended only for isolated sandboxes with no internet access. |
123 | Claude Process Wrapper | Executable path used to launch the Claude process |
124
125* **Claude Code settings** (`~/.claude/settings.json`): These settings are shared between the VS Code extension and the CLI. Use this file for allowed commands and directories, environment variables, hooks, and MCP servers. See the [settings documentation](/en/settings) for details.
126
127## Use third-party providers
128
129By default, Claude Code connects directly to Anthropic's API. If your organization uses Amazon Bedrock, Google Vertex AI, or Microsoft Foundry to access Claude, configure the extension to use your provider instead:
130
131<Steps>
132 <Step title="Disable login prompt">
133 Open the [Disable Login Prompt setting](vscode://settings/claudeCode.disableLoginPrompt) and check the box.
134
135 You can also open VS Code settings (`Cmd+,` on Mac or `Ctrl+,` on Windows/Linux), search for "Claude Code login", and check **Disable Login Prompt**.
136 </Step>
93 137
94When Claude Code runs in VS Code with auto-edit permissions enabled, it may be able to modify IDE configuration files that can be automatically executed by your IDE. This may increase the risk of running Claude Code in auto-edit mode and allow bypassing Claude Code's permission prompts for bash execution.138 <Step title="Configure your provider">
139 Follow the setup guide for your provider:
95 140
96When running in VS Code, consider:141 * [Claude Code on Amazon Bedrock](/en/amazon-bedrock)
142 * [Claude Code on Google Vertex AI](/en/google-vertex-ai)
143 * [Claude Code on Microsoft Foundry](/en/microsoft-foundry)
97 144
98* Enabling [VS Code Restricted Mode](https://code.visualstudio.com/docs/editor/workspace-trust#_restricted-mode) for untrusted workspaces145 These guides cover configuring your provider in `~/.claude/settings.json`, which ensures your settings are shared between the VS Code extension and the CLI.
99* Using manual approval mode for edits146 </Step>
100* Taking extra care to ensure Claude is only used with trusted prompts147</Steps>
101 148
102## Legacy CLI integration149## VS Code extension vs. Claude Code CLI
103 150
104The original VS Code integration allows Claude Code running in the terminal to interact with your IDE. It provides selection context sharing (current selection/tab is automatically shared with Claude Code), diff viewing in the IDE instead of terminal, file reference shortcuts (`Cmd+Option+K` on Mac or `Alt+Ctrl+K` on Windows/Linux to insert file references like @File#L1-99), and automatic diagnostic sharing (lint and syntax errors).151The extension doesn't yet have full feature parity with the CLI. If you need CLI-only features, you can run `claude` directly in VS Code's integrated terminal.
105 152
106The legacy integration auto-installs when you run `claude` from VS Code's integrated terminal. Run `claude` from the terminal and all features activate. For external terminals, use the `/ide` command to connect Claude Code to your VS Code instance. To configure, run `claude`, enter `/config`, and set the diff tool to `auto` for automatic IDE detection.153| Feature | CLI | VS Code Extension |
154| ------------------- | ------------------------------ | ---------------------------------------- |
155| Slash commands | [Full set](/en/slash-commands) | Subset (type `/` to see available) |
156| MCP server config | Yes | No (configure via CLI, use in extension) |
157| Checkpoints | Yes | Coming soon |
158| `#` memory shortcut | Yes | No |
159| `!` bash shortcut | Yes | No |
160| Tab completion | Yes | No |
107 161
108Both the extension and CLI integration work with Visual Studio Code, Cursor, Windsurf, and VSCodium.162### Run CLI in VS Code
109 163
110## Troubleshooting164To use the CLI while staying in VS Code, open the integrated terminal (`` Ctrl+` `` on Windows/Linux or `` Cmd+` `` on Mac) and run `claude`. The CLI automatically integrates with your IDE for features like diff viewing and diagnostic sharing.
111 165
112### Extension not installing166If using an external terminal, run `/ide` inside Claude Code to connect it to VS Code.
113 167
114* Ensure you have a compatible version of VS Code (1.85.0 or later)168### Switch between extension and CLI
169
170The extension and CLI share the same conversation history. To continue an extension conversation in the CLI, run `claude --resume` in the terminal. This opens an interactive picker where you can search for and select your conversation.
171
172## Security considerations
173
174With auto-edit permissions enabled, Claude Code can modify VS Code configuration files (like `settings.json` or `tasks.json`) that VS Code may execute automatically. This could potentially bypass Claude Code's normal permission prompts.
175
176To reduce risk when working with untrusted code:
177
178* Enable [VS Code Restricted Mode](https://code.visualstudio.com/docs/editor/workspace-trust#_restricted-mode) for untrusted workspaces
179* Use manual approval mode instead of auto-accept for edits
180* Review changes carefully before accepting them
181
182## Fix common issues
183
184### Extension won't install
185
186* Ensure you have a compatible version of VS Code (1.98.0 or later)
115* Check that VS Code has permission to install extensions187* Check that VS Code has permission to install extensions
116* Try installing directly from the Marketplace website188* Try installing directly from the Marketplace website
117 189
190### Spark icon not visible
191
192There are two places the Spark icon can appear:
193
194* **Editor Toolbar** (top-right of editor): Only visible when a file is open
195* **Activity Bar** (left sidebar): Only visible after running "Claude Code: Open in Side Bar" from the Command Palette
196
197If you don't see the icon:
198
1991. **Open a file**: The Editor Toolbar icon requires a file to be open—having just a folder open isn't enough
2002. **Enable the Activity Bar icon**: Run "Claude Code: Open in Side Bar" from the Command Palette once, and the icon will appear in the Activity Bar permanently
2013. **Check VS Code version**: Requires 1.98.0 or higher (Help → About)
2024. **Restart VS Code**: Run "Developer: Reload Window" from the command palette
2035. **Disable conflicting extensions**: Temporarily disable other AI extensions (Cline, Continue, etc.)
2046. **Check workspace trust**: The extension doesn't work in Restricted Mode
2057. **Use the Command Palette**: Open with `Cmd+Shift+P` (Mac) or `Ctrl+Shift+P` (Windows/Linux), then type "Claude Code: Open in Side Bar"
206
118### Claude Code never responds207### Claude Code never responds
119 208
120If Claude Code isn't responding to your prompts:209If Claude Code isn't responding to your prompts:
1243. **Try the CLI**: Run `claude` from the terminal to see if you get more detailed error messages2133. **Try the CLI**: Run `claude` from the terminal to see if you get more detailed error messages
1254. **File a bug report**: If the problem continues, [file an issue on GitHub](https://github.com/anthropics/claude-code/issues) with details about the error2144. **File a bug report**: If the problem continues, [file an issue on GitHub](https://github.com/anthropics/claude-code/issues) with details about the error
126 215
127### Legacy integration not working216### Standalone CLI not connecting to IDE
128 217
129* Ensure you're running Claude Code from VS Code's integrated terminal218* Ensure you're running Claude Code from VS Code's integrated terminal (not an external terminal)
130* Ensure the CLI for your IDE variant is installed:219* Ensure the CLI for your IDE variant is installed:
131 * VS Code: `code` command should be available220 * VS Code: `code` command should be available
132 * Cursor: `cursor` command should be available221 * Cursor: `cursor` command should be available
133 * Windsurf: `windsurf` command should be available222 * Windsurf: `windsurf` command should be available
134 * VSCodium: `codium` command should be available223 * VSCodium: `codium` command should be available
135* If the command isn't installed:224* If the command isn't available, install it from the Command Palette → "Shell Command: Install 'code' command in PATH"
136 1. Open command palette with `Cmd+Shift+P` (Mac) or `Ctrl+Shift+P` (Windows/Linux)225
137 2. Search for `Shell Command: Install 'code' command in PATH` (or equivalent for your IDE)226## Uninstall the extension
227
228To uninstall the Claude Code extension:
229
2301. Open the Extensions view (`Cmd+Shift+X` on Mac or `Ctrl+Shift+X` on Windows/Linux)
2312. Search for "Claude Code"
2323. Click **Uninstall**
233
234To also remove extension data and reset all settings:
235
236```bash theme={null}
237rm -rf ~/.vscode/globalStorage/anthropic.claude-code
238```
138 239
139For additional help, see the [troubleshooting guide](/en/troubleshooting).240For additional help, see the [troubleshooting guide](/en/troubleshooting).
140 241
242## Next steps
243
244Now that you have Claude Code set up in VS Code:
245
246* [Explore common workflows](/en/common-workflows) to get the most out of Claude Code
247* [Set up MCP servers](/en/mcp) to extend Claude's capabilities with external tools. Configure servers using the CLI, then use them in the extension.
248* [Configure Claude Code settings](/en/settings) to customize allowed commands, hooks, and more. These settings are shared between the extension and CLI.
249
141 250
142---251---
143 252
